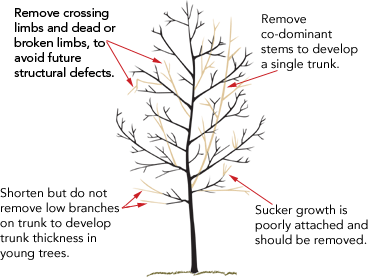
Pruning Guidelines
Correct pruning is one of the best things you can do for your plants.
Incorrect pruning cuts can encourage bacteria or fungi to infest plants. Cuts on the wrong part of the plant can stunt growth, prevent seasonal blooms, or result in poorly-shaped and weak plants. The diagrams below will help you determine how to properly make pruning cuts.
Pruning Smaller Branches
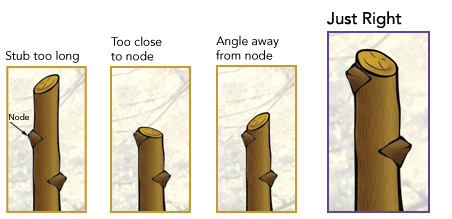
Nodes: Nodes are points of growth on branches. You can find them by looking for tiny buds or notches on the branches. The node you leave in place is likely to grow into a new branch in the direction it is facing.
Cutting Large Branches
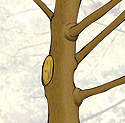
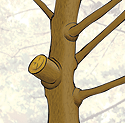
When you cut, leave the portion of the branch called the “collar” in place. The collar is the outer curve of the branch identified in the diagram below. The collar contains protective chemicals that will help your tree or shrub heal more quickly make infection less likely.
Three-Step Cutting Method
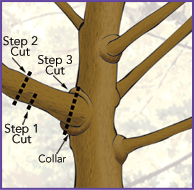 Use these steps for branches more than one inch thick. Make sure the limb will not damage anything as it falls from the tree or shrub.
- Measure about 6-8 inches from the trunk. Make a cut on the underside of the branch cutting about 1/3 of the way into the branch.
- Make a cut clear through the branch about a foot away from the trunk to remove the bulk of the branch. This leaves a long stump.
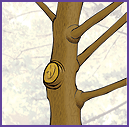
- Make a second clean cut just outside the collar to leave a slight stump that will heal well.
| Just Right | Too close to trunk | Too long |
 |
 |
 |
Shaping or Shortening Large Tree of Shrub
The biggest mistake homeowners make is cutting all tree branches to the same length often known as “topping”. This shearing of branches is unsightly and weakens the tree.
- Choose a branch to trim and follow the branch from its tip to its point of origin.
- Make a careful cut of that branch following the three-step method.
- Choose another branch and follow it down to its point of origin and repeat.
- Continue cutting and shaping in this manner until the tree has desired height or shape.
|
|
